Supplies:
Formula can (this is 12.4ozs)
Scissors
Knit tights (stockings)
Obviously remove the label and top and wash out cans
Take tights and snip off very bottom
Then cut about an 8" piece ( I got 8 cans done from 1 pair of tights)
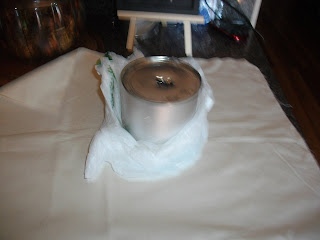
Basically just slip on the tights and scrunch.
Not ridiculously elegant but that's fine. We are casual and cozy in this house!
This could be cute for a BBQ or a child's desk. My daughter asked for some for her makeup brushes and her eyeliner (kids think of the easiest things)lol
I put this out when we have a casual dinner and Ive been teaching my 3 1/2 year old to set the table ( girl tradition in the house) so its easier and safer for her to carry everything.
I also have one of my desk to hold pencils and I have some on my desk downstairs in my studio (not yet complete) holding random things.
I must give partial credit to Stephanie Lynn from Under The Table Dreaming, she did a project called Sweater Vases and it gave me the inspiration to do this. Slight variation in materials but still in same theme. You can see her project over at her blog http://www.bystephanielynn.com/2010/09/more-recycled-sweater-vases-easy-simple.html
Total Cost of this project: $ 0.00
Cans: They wouldve been garbage. lol
Tights: I bought those when managing a Forever 21 store a few years back.
OKAY......ANOTHER UPDATE:
I came across another fabulous project! This one is from Alison @ Classy Columbus Designs....here is her link for the pumpkin project (but check out her full blog....very cool stuff) http://classycolumbusdesigns.blogspot.com/2010/09/design-on-dime-fabric-pumpkins.html
So here I decided after seeing her pumpkins I would give it a try...I first commented her page and thanked her for the inspiration. Then I got the baby down for a nap, grabbed my supplies and heading to the workshop.
Now I switched out my supplies a little from hers, and as I told her with 5 children I cant afford to use toilet paper rolls in my crafts anymore. lol
So I used the formula cans Ive been saving and using for organization (like the above project)...so here is what I came up with.
Supplies:
Formula can
22 x 22 piece of muslin (any soft fabric)
Plastic grocery store bags
Paper bag
Scissor
Can opener
Muslin fabric (roughly 22 x 22 square)

Formula Can ( washed out)
Brown paper lunch bag
Plastic grocery bags
Turn can up side down and use can opener to punch a quarter size whole in the center.
Put down your fabric...place a plastic bag down (scrunch it) then put down your can (hole side up)
Wrap the plastic bags loosely around the can.... then grab one corner and push into hole.
Work your way around the whole can in one direction and you will get nice pleats on your pumpkin.
Roll/twist up your paper bag and glue into the center of your pumpkin for a cool stem.
Check out my pumpkin patch! All of these pumpkins were made in less than 30 minutes. And the best part of all for FREE......yes FREE!!!!!
Total cost of this project : $0.00
Fabric: on hand
cans : saved from use
bags: saved from grocery shopping trips
paper bags: use for pre k snacks mon-fri
So you now have 2 different projects from recycled items in your home.
What are you waiting for......you don't have to go to the patch for pumpkins! Make your own and you will also be helping Mother Earth. (those plastic bags and cans will stay in your decoration and not the land fills) and dumps.
I came across another fabulous project! This one is from Alison @ Classy Columbus Designs....here is her link for the pumpkin project (but check out her full blog....very cool stuff) http://classycolumbusdesigns.blogspot.com/2010/09/design-on-dime-fabric-pumpkins.html
So here I decided after seeing her pumpkins I would give it a try...I first commented her page and thanked her for the inspiration. Then I got the baby down for a nap, grabbed my supplies and heading to the workshop.
Now I switched out my supplies a little from hers, and as I told her with 5 children I cant afford to use toilet paper rolls in my crafts anymore. lol
So I used the formula cans Ive been saving and using for organization (like the above project)...so here is what I came up with.
Supplies:
Formula can
22 x 22 piece of muslin (any soft fabric)
Plastic grocery store bags
Paper bag
Scissor
Can opener
Muslin fabric (roughly 22 x 22 square)

Formula Can ( washed out)
Brown paper lunch bag
Plastic grocery bags
Turn can up side down and use can opener to punch a quarter size whole in the center.
Put down your fabric...place a plastic bag down (scrunch it) then put down your can (hole side up)
Wrap the plastic bags loosely around the can.... then grab one corner and push into hole.
Work your way around the whole can in one direction and you will get nice pleats on your pumpkin.
Roll/twist up your paper bag and glue into the center of your pumpkin for a cool stem.
Check out my pumpkin patch! All of these pumpkins were made in less than 30 minutes. And the best part of all for FREE......yes FREE!!!!!
Total cost of this project : $0.00
Fabric: on hand
cans : saved from use
bags: saved from grocery shopping trips
paper bags: use for pre k snacks mon-fri
So you now have 2 different projects from recycled items in your home.
What are you waiting for......you don't have to go to the patch for pumpkins! Make your own and you will also be helping Mother Earth. (those plastic bags and cans will stay in your decoration and not the land fills) and dumps.














Love all of your projects! Great ideas and thrifty even better!!! Hope you have a great week!
ReplyDeleteThat is so stinking cute...both of those projects. I love how it was FREE. My next Before and after party is next Wed:)
ReplyDeletethese are so cute and thrifty! what great ideas!
ReplyDeleteI love the pumpkins- they are so cute! And, I love FREE!!! :)
ReplyDeleteI found your blog from Alison, over at Classy Columbus Designs! I love your idea by using the formula cans, fantastic and who does not love free! Stop by my blog http://funsavingmom.blogspot.com where my goal is to get as much as I can for free or close to it!
ReplyDeleteYou are a clever, clever girl!! What grand ideas. I love the pumpkins and I am always looking for thrifty crafts.
ReplyDeleteBlessings!
Gail
Wow! I remember those formula can days;0) It's great to see you find these creative uses for them! Two great ideas! Thanks for sharing.
ReplyDelete~Holly
Both of these projects are so clever and so pretty. Love the tights containers, they are wonderful. Your pumpkins are just stunning. What a great way to recycle all of those cans and plastic bags and to wind up with something so fabulous. Great tutorials too. Thanks so much for the ideas and for linking to TTT. Hugs, Marty
ReplyDeleteWhat fun projects! I especially love those pumpkins. Thanks for some great ideas!
ReplyDelete