.

.
CLICK HERE FOR WEBSITE

Pages

Showing posts with label DIY. Show all posts

Friday, December 6, 2013

HANDMADE TREE DECOR - Day 6 Holiday Decor

While Im not always the Queen of DIY, I do like to find less expensive ways of doing things.   This year in the new house...I wanted to decorate the tree with what we already had.  

I save my ornaments every year and had built quite a collection, unfortunately due to the move, many were broken and damaged.   But that's not going to stop me of course.

There are a few trees in the house this year.   As of right now the count is 5...not all large but I will be sharing the final trees the week of Christmas.

Im a huge fan of burlap as anyone who follows this blog or my IG and FB pages knows..lol    I wanted to incorporate some burlap in my tree this year....which I have never done before.   However spools of burlap ribbon are kinda pricey, not in my holiday budget this year.  

Sooooooooooooooooooo what do I do............  Break out the burlap scraps from the closet.

I just completed a wedding project of 12 ft burlap runners ( I ordered extra burlap for my own runners)


Nice sharp scissor needed for cutting


I cut approx 4 in strips (my runners were 12 in wide)


I then pulled a center piece of burlap thread and scrunched it down, then knotted at both ends.


Easy and simple....you can buy a yard of burlap at Jo-Ann's for approximately $3.99 and don't forget your coupons people (40% off single cut is big savings)


Check back to see how this looks up on the tree and what else I have planned this year.


- MJ

Sunday, December 1, 2013

OTTOMAN MAKEOVER - Day 1 Christmas Countdown

We moved to the new house....I had this ottoman that was extra seating and storage in the other house.  The top had been torn apart by my then 2 year old.   So I decided to recover it and use it in the family room in the new house.

I purchased some denim fabric from Jo-Ann's and just simply stapled in underneath.  I already has a black liner on it so Im going to leave it as is....Oh by the way it's a flip open ottoman.


I used a light denim because the feel of this room if junky vintage collectibles.  So this to me was like a worn pair of jeans.


This is how the top turned out..not bad.   The bottom is still in fair condition and matches the section we purchased last November. 


Here is some tabletop adornment for the holidays.


I will be posting a Christmas decor/craft everyday from Dec 1 - Dec 23


-MJ


Thursday, November 28, 2013

BURLAP ON THE TABLE

I had a wedding project that was due the week of Thanksgiving...so with 20+ yards of burlap for the project and some extra for me.   I decided to add 1 more to my order......for MYSELF!

I love Burlap, but not my favorite fabric to work with...so messy!


My runners for the wedding project were 12 ft long with tasseled edges.  Here is how I did the edges. 


Here is a finished runner on my Thanksgiving day table...I went with a casual rustic theme with vintage pieces on the table.


HOPE EVERYONE HAD A WONDERFUL HOLIDAY!!


-MJ

Sunday, September 26, 2010

BURLAP BANNER....MY INTERNATIONAL VERSION.

Well now...there are tons of burlap crafts and tons of banners out there.   So me being me.....I wanted to do something different.   In my home, we are like the United Nations (my friends and I always joke...we've got all ethnicities covered).   Im very proud of my family history and culture so I use it in the decor of my home as much as possible.   The holidays are no different.....I dont like to make novelty holiday stuff for Halloween and Autumn/Fall is my favorite time of year!

I decided to make a burlap banner for my fireplace area.  I first thought of F-A-L-L, but that would be to mainstream for me. lol   Im an out-of-the-box kinda girl.  

I decided to make my Autumn banner is the different languages that represent our family and our different backgrounds.

Italian/Spanish - Me
French - Big Daddy is from the island of Domenica (an English/French speaking island)

So the kiddos in this house are Italian/Sicilian, PuertoRican/Cuban, Dominican (the island not D.R)


Supplies:

Burlap..(I have a ton of burlap bags)
Alphabet Stencil
Faux Fall Leaves (garland)
Twine or Rope ( i used ties from burlap bags)
Scissors
Acrylic Paint 


Burlap Bags


Alphabet Stencil


Black Acrylic Paint


Faux Fall Leaves

Cut your burlap into pennant shapes (8 x10 is good)


Stencil on your lettering (whatever you choose)


Finished banner on fireplace in living room


Autumn in English  


Autumn in Italian


Autumn in Spanish


Autumn in French


                                              Our international burlap banner in our eclectic living room. lol


Saturday, September 25, 2010

A WEEK OF THRIFTY PROJECTS...... DAY 7 - FOAM BOARD

So with all the school projects in this house, there is never a shortage of poster board or foam board.  This is a simple project that I did for Halloween.

Supplies:

Foam Board
Telephone Book
Alphabet Stencil Sheet
Black Marker
Glue
Paint Brush


Clean Foam Board


Rip out telephone pages


Glue them to the foam board (dont use to much) I watered down the glue and did kind of decoupage thing


After dry....Stencil on your spooky words and I glued on a wooden pumpkin shape.


close up of text


close up of more words


Wednesday, September 22, 2010

A WEEK OF THRIFTY PROJECTS...... DAY 6 - BEANS

This is another easy ingredient that I love to use for decoratoring.   Its versatile and I love texture so this works for me.   Its cheap and I always have beans in the house.

Supplies:

Goya Wedding Soup Mixed Beans
Glass Container
Sticks


Glass Container (Dollar Tree)


Fill Container with beans


Put in a bunch of tied sticks


Left side of fall mantle 


                                                                Right side of mantle


Close up shot.....I love the colors and the texture.  (looks great in a bigger container as well.

Tuesday, September 21, 2010

A WEEK OF THRIFTY PROJECTS...... DAY 5 - JAR

Another item to use for displays is mason jars, ball jars....basically any kind of canning jar.   I actually dont can food, I just like the look of them and I use them to store my food in my cabinets.  Rice, animal crackers anything that once opened is a pain to keep neat and contained.


Supplies:

Canning jar
Goya Brown Rice
candle


Pour rice in jar about 1/4 up


Sorry I must've deleted the previous picture but you get the idea....put the candle inside (cover off) and I threaded some leaves with ties from my burlap bags

Monday, September 20, 2010

A WEEK OF THRIFTY PROJECTS...... DAY 4 - FORMULA CAN

 I'm the mother of a 6 month old baby girl and although she is breastfed majority of the time.  I do give her some formula as well.  So I have been saving some empty formula cans with the intention of doing something with them.

Supplies:

Formula can (this is 12.4ozs)
Scissors
Knit tights (stockings)


Obviously remove the label and top and wash out cans

Take tights and snip off very bottom 

Then cut about an 8" piece ( I got 8 cans done from 1 pair of tights)

Basically just slip on the tights and scrunch.

I probably with adorn with some leaves and jute for the fall, but for now I like the texture of the tights.
Not ridiculously elegant but that's fine.   We are casual and cozy in this house!

This could be cute for a BBQ or a child's desk.     My daughter asked for some for her makeup brushes and her eyeliner (kids think of the easiest things)lol


I put this out when we have a casual dinner and Ive been teaching my 3 1/2 year old to set the table ( girl tradition in the house) so its easier and safer for her to carry everything.

I also have one of my desk to hold pencils and I have some on my desk downstairs in my studio (not yet complete) holding random things.

I must give partial credit to Stephanie Lynn from Under The Table Dreaming, she did a project called Sweater Vases and it gave me the inspiration to do this.   Slight variation in materials but still in same theme. You can see her project over at her blog http://www.bystephanielynn.com/2010/09/more-recycled-sweater-vases-easy-simple.html

Total Cost of this project: $ 0.00

Cans:   They wouldve been garbage. lol
Tights:  I bought those when managing a Forever 21 store a few years back.

OKAY......ANOTHER UPDATE:

I came across another fabulous project!  This one is from Alison @ Classy Columbus Designs....here is her link for the pumpkin project (but check out her full blog....very cool stuff) http://classycolumbusdesigns.blogspot.com/2010/09/design-on-dime-fabric-pumpkins.html

So here I decided after seeing her pumpkins I would give it a try...I first commented her page and thanked her for the inspiration.  Then I got the baby down for a nap, grabbed my supplies and heading to the workshop.

Now I switched out my supplies a little from hers, and as I told her with 5 children I cant afford to use toilet paper rolls in my crafts anymore. lol

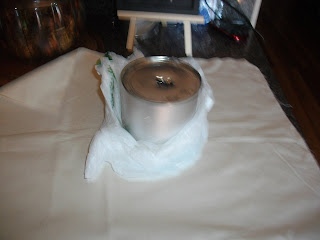
So I used the formula cans Ive been saving and using for organization (like the above project)...so here is what I came up with.

                                                                          Supplies:
                                                                Formula can
                                                                22 x 22 piece of muslin (any soft fabric)
                                                                Plastic grocery store bags
                                                                Paper bag
                                                                Scissor
                                                                Can opener

                                                  Muslin fabric (roughly 22 x 22 square)

                                     
                                               Formula Can ( washed out)

                                                    Brown paper lunch bag


                                                     Plastic grocery bags


         Turn can up side down and use can opener to punch a quarter size whole in the center.


 Put down your fabric...place a plastic bag down (scrunch it) then put down your can (hole side up)


Wrap the plastic bags loosely around the can.... then grab one corner and push into hole.

Work your way around the whole can in one direction and you will get nice pleats on your pumpkin.

                       Roll/twist up your paper bag and glue into the center of your pumpkin for a cool stem.


Check out my pumpkin patch!   All of these pumpkins were made in less than 30 minutes.   And the best part of all for FREE......yes FREE!!!!!

Total cost of this project :    $0.00

Fabric:  on hand
cans :  saved from use
bags:  saved from grocery shopping trips
paper bags:  use for pre k snacks mon-fri

So you now have 2 different projects from recycled items in your home.  

What are you waiting for......you don't have to go to the patch for pumpkins!   Make your own and you will also be helping Mother Earth.   (those plastic bags and cans will stay in your decoration and not the land fills) and dumps.


 UndertheTableandDreaming